Transform Your Garage Attic with These Top Types of Blown-In Insulation
Table of Contents
1. Introduction
2. The Benefits of Cellulose Blown-In Insulation for Garage Attics
3. Fiberglass vs. Spray Foam: Choosing the Right Blown-In Insulation
4. Maximizing Energy Efficiency with Blown-In Insulation
5. Q&A
6. Conclusion
Introduction
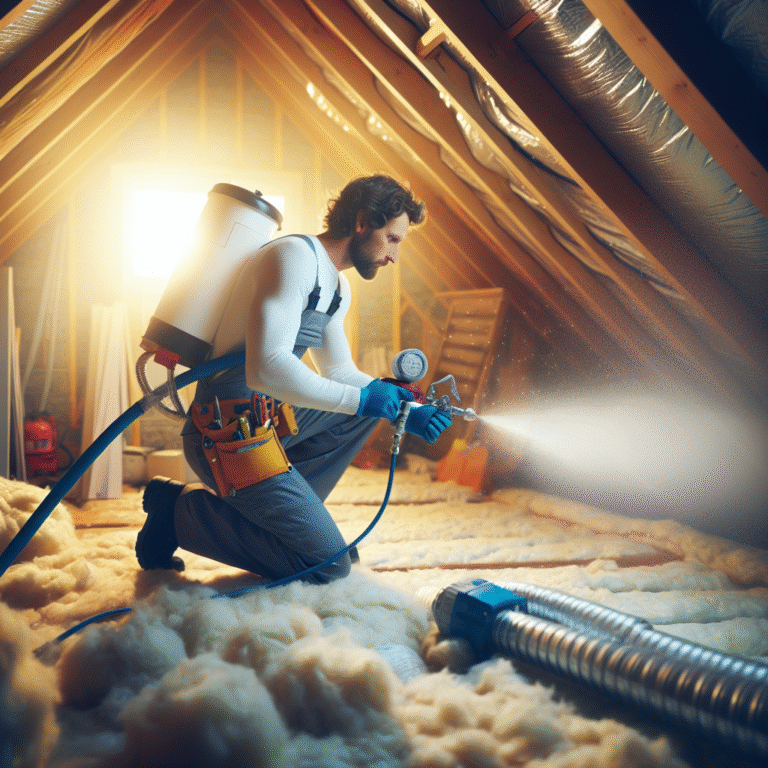
Blown-in insulation has become a go-to solution for homeowners looking to boost comfort and cut energy bills. In a garage attic—often a neglected space—adding the right blown-in insulation can transform an underused area into a temperature-stable zone, reduce drafts, and even dampen noise. This guide dives into the top types of blown-in insulation for your garage attic, compares their strengths and weaknesses, and shows you how to maximize efficiency. Whether you’re starting a DIY project or planning to hire a pro, understanding your options will help you make the best decision.
The Benefits of Cellulose Blown-In Insulation for Garage Attics
Cellulose blown-in insulation stands out for its eco-friendly composition and performance. Made from recycled paper treated with fire-retardant borate, it offers:
• Superior Coverage: The loose fibers settle into every nook and cranny—around pipes, wires, rafters—creating a seamless thermal barrier.
• High R-Value: Approximately R-3.5 per inch, cellulose outperforms fiberglass in many applications, keeping heat in during winter and out in summer.
• Sound Dampening: Dense cellulose fibers absorb airborne noise, making your garage attic quieter if it doubles as a workshop or home gym.
• Fire Resistance and Pest Deterrence: Borate treatment not only slows flame spread but also repels insects and inhibits mold growth.
• Eco-Friendliness: With a high recycled-content ratio and lower manufacturing emissions, cellulose is one of the greenest insulation choices available.
Installation is straightforward: a professional uses a blowing machine to deposit cellulose evenly, filling hard-to-reach spots quickly and efficiently. For homeowners seeking both sustainability and performance, cellulose blown-in insulation should top the list.
Fiberglass vs. Spray Foam: Choosing the Right Blown-In Insulation
When it comes to blown-in insulation in garage attics, fiberglass and spray foam each have advantages:
Fiberglass Blown-In Insulation
• Cost-Effective: Typically less expensive per square foot than other types.
• Fire and Moisture Resistance: Naturally noncombustible and does not absorb water.
• Easy Handling: Available in pre-bagged form for blowing machines.
Drawbacks include potential settling over time—creating voids—and airborne fibers during installation, which require protective gear.
Spray Foam Insulation
• Superior Air Seal: Expanding foam fills gaps and cracks, providing an airtight envelope.
• High R-Value: Closed-cell spray foam delivers R-6 to R-7 per inch, the highest among insulating materials.
• Longevity: Doesn’t settle or degrade, maintaining performance for decades.
• Structural Rigidity: Adds strength to attic structures.
The main downside is higher material and installation costs, plus professional application is essential to ensure safety and coverage.
Choosing between fiberglass and spray foam depends on budget, desired R-value, and whether you prioritize air sealing or cost savings.
Maximizing Energy Efficiency with Blown-In Insulation
A well-insulated garage attic can shave up to 20% off your heating and cooling bills. To maximize energy efficiency with blown-in insulation, follow these steps:
1. Air Sealing First: Seal gaps around ductwork, vents, light fixtures, and the attic hatch with caulk or expanding foam.
2. Proper Depth and Coverage: Calculate the required R-value for your climate zone—often R-30 to R-60—and ensure the insulation meets or exceeds that depth.
3. Ventilation Balance: Maintain soffit and ridge vents to prevent moisture buildup and allow any trapped humidity to escape.
4. Professional Assessment: A thermal imaging inspection can reveal cold spots and air leaks before installation, ensuring targeted coverage.
By combining air sealing with the right blown-in insulation type and depth, you’ll create a continuous thermal barrier that keeps your entire home more comfortable year-round.
Q&A
Q1: What makes blown-in insulation better than batt insulation for garage attics?
A1: Blown-in insulation fills irregular spaces and voids more completely than batt insulation, reducing gaps and improving overall thermal performance.
Q2: Can I install blown-in insulation myself?
A2: DIY installation is possible with rented blowing machines, but professionals ensure even coverage, proper density, and correct R-value depth.
Q3: How long does blown-in insulation last in a garage attic?
A3: Cellulose and fiberglass blown-in insulation can last 20–30 years if kept dry. Spray foam can last even longer without settling or degradation.
Conclusion
Investing in blown-in insulation for your garage attic is one of the smartest home improvements you can make. Whether you choose cellulose for its eco-friendly fire resistance, fiberglass for cost-effectiveness, or spray foam for top-tier air sealing and R-value, blown-in insulation boosts comfort and energy savings. Proper installation and air sealing practices will help you reap the full benefits—lower bills, quieter spaces, and a more sustainable home. Transform your garage attic today with a tailored blown-in insulation solution and enjoy a cozier, more efficient living environment.