Table of Contents
1. Introduction
2. H2: Why DIY Blown-In Cellulose Attic Insulation Works
3. H2: How to Save Money with DIY Blown-In Cellulose Attic Insulation
4. H2: Step-by-Step Installation Guide for DIY Blown-In Cellulose Attic Insulation
5. H2: Frequently Asked Questions
6. Conclusion
Introduction
If you’re tired of skyrocketing energy bills and uneven indoor temperatures, DIY Blown-In Cellulose Attic Insulation offers an affordable way to transform your home’s comfort. By using recycled cellulose fibers blown into your attic, you create a thick thermal barrier that keeps heat inside during winter and out during summer. In this guide, we’ll explore the benefits, cost savings, installation steps, and expert tips for tackling this rewarding weekend project yourself.
H2: Why DIY Blown-In Cellulose Attic Insulation Works
• High R-Value per Inch: Cellulose insulation delivers an R-value of 3.2–3.8 per inch, outpacing standard fiberglass batts (2.2–2.7). That means better thermal resistance and more consistent indoor temperatures.
• Gap-Filling Performance: Unlike rigid batts, the loose-fill fibers conform to any shape, sealing cracks and voids where air tends to leak. This airtight barrier reduces drafts and noise infiltration.
• Eco-Friendly Composition: Made from recycled paper treated with borate, cellulose is one of the greenest insulation options. Borate also repels pests and provides fire resistance—no harsh chemicals required.
• Longevity and Stability: Cellulose won’t settle or compress over time, ensuring your attic stays fully insulated for years without the need to “top up” or replace.
H2: How to Save Money with DIY Blown-In Cellulose Attic Insulation
• Lower Material Costs: Bags of cellulose insulation typically cost less per R-value than foam or fiberglass, so your upfront investment is smaller.
• No Labor Fees: Renting a blower machine and installing the insulation yourself can cut labor costs by hundreds of dollars. Most hardware stores rent insulation blowers for a day at a minimal fee.
• Year-Round Energy Savings: Properly insulated attics can reduce heating and cooling expenses by up to 20%, quickly offsetting material and rental costs.
• Potential Rebates and Tax Credits: Many regions offer incentives for energy-efficient home improvements. Check local programs for rebates on insulation projects.
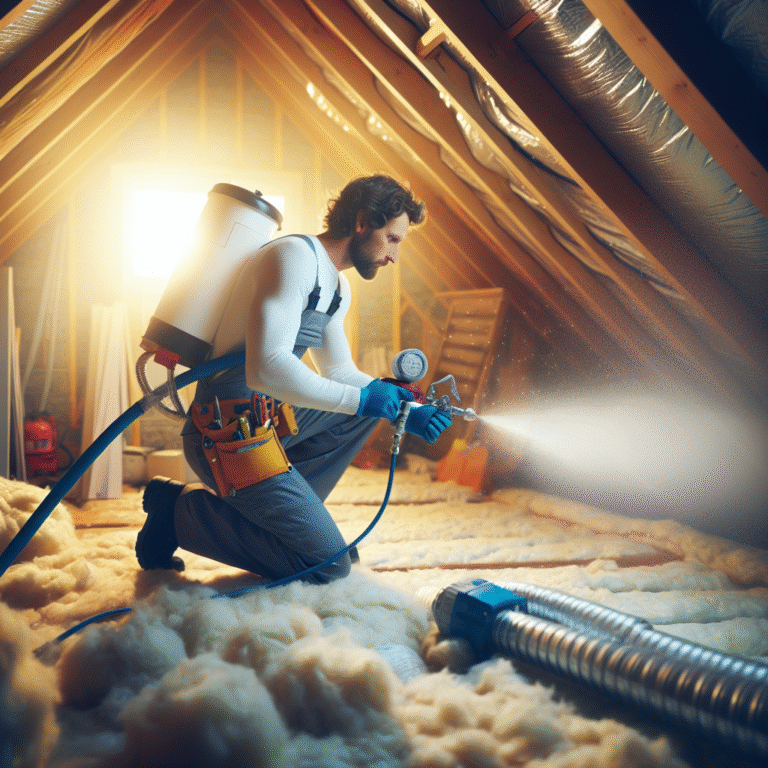
H2: Step-by-Step Installation Guide for DIY Blown-In Cellulose Attic Insulation
1. Prepare the Space
– Clear debris, stored items, and obstructions from your attic floor.
– Seal gaps around ductwork, pipes, and wiring with caulk or foam sealant.
– Install baffles at eaves to maintain proper ventilation and prevent airflow blockage.
2. Gather Tools and Materials
– Cellulose insulation bags (calculate coverage: one bag covers ~40 sq. ft. at 10” depth)
– Insulation blower (rent from hardware store)
– Long hose and protective nozzle for the blower
– Safety gear: respirator mask, goggles, gloves, and coveralls
3. Load the Blower Machine
– Follow the manufacturer’s instructions to feed cellulose into the hopper.
– Wear your respirator to avoid inhaling dust.
4. Begin Blowing Insulation
– Start at the far corner of the attic, working toward the access point.
– Keep the hose tip ~12 inches above the attic floor, distributing insulation evenly.
– Maintain a consistent depth by periodically measuring with a ruler or marked stick.
5. Fill Gaps and Corners
– Angle the hose to blow insulation into tight corners, around vents, and under joists.
– Hand-pack extra insulation in small cavities if needed.
6. Check Coverage and Adjust
– Aim for a total depth of 12–14 inches (R-38 to R-50) depending on your climate zone.
– Add a second layer if necessary to reach the recommended R-value.
7. Clean Up and Seal Entrance
– Vacuum or sweep up loose fibers around the attic entrance.
– Install an insulated cover or hatch to prevent heat loss through the access point.
H2: Frequently Asked Questions
Q: How long does it take to install DIY blown-in cellulose attic insulation?
A: A typical 1,000 sq. ft. attic takes 3–5 hours for two people, including prep and cleanup.
Q: Can I install insulation over existing fiberglass batts?
A: Yes. Blown-in cellulose conforms around batts, improving coverage and reducing air gaps.
Q: Is cellulose insulation safe around wiring and fixtures?
A: Yes, provided you maintain clearances around non-insulated fixtures and seal any recessed lighting per building codes.
Conclusion
DIY Blown-In Cellulose Attic Insulation is a cost-effective foam solution—without the foam—that slashes energy bills, boosts home comfort, and treads lightly on the planet. With high R-values, superior gap-filling performance, and straightforward installation, this eco-friendly insulation pays for itself in lower utility costs and lasting performance. Ready to tackle your attic transformation? Gather your materials, enlist a helper, and enjoy a cozier, more energy-efficient home from the very first season.