Revamp Your Attic with Owens Corning Blown-In Insulation: The Ultimate Guide
Table of Contents
1. Introduction
2. Benefits of Owens Corning Blown-In Insulation
3. Comparing Owens Corning Blown-In Insulation vs. Fiberglass
4. How to Install Owens Corning Blown-In Insulation for Maximum Efficiency
5. Frequently Asked Questions
6. Conclusion
Introduction
Your attic plays a crucial role in your home’s comfort and energy efficiency. Yet many homeowners overlook this space, allowing heat to escape in winter and invade in summer. Owens Corning blown-in insulation offers a fast, effective way to seal every crack and crevice—slashing energy bills while enhancing indoor comfort. In this ultimate guide, we’ll explore the advantages, compare it to traditional fiberglass, walk you through proper installation, and answer the top questions about Owens Corning blown-in insulation.
Benefits of Owens Corning Blown-In Insulation
Owens Corning blown-in insulation brings a host of advantages that make it a smart investment for any attic:
• Superior Thermal Performance: Tiny fiberglass fibers pack together to form a continuous barrier. They resist heat transfer, helping your HVAC system run less and your home stay at a stable temperature.
• Complete Coverage: Unlike batts that leave gaps around pipes or wiring, blown-in insulation conforms to every nook and cranny. This seamless fill reduces drafts and cold spots.
• Noise Reduction: The dense, tangled fibers absorb sound, minimizing traffic noise, HVAC hum, and footsteps from upstairs rooms.
• Fire Resistance and Non-Combustibility: Fiberglass is naturally fire-resistant. In a fire, Owens Corning blown-in insulation won’t fuel flames or emit toxic fumes, giving your family extra time to exit safely.
• Moisture, Mold and Mildew Resistance: Fiberglass doesn’t absorb water, so mold and mildew can’t take root. This keeps indoor air healthier and your attic structure protected.
• Eco-Friendly and Cost-Effective: AttiCat, Owens Corning’s signature formula, contains up to 99% recycled glass. Lower energy bills and minimal maintenance deliver excellent long-term savings.
Comparing Owens Corning Blown-In Insulation vs. Fiberglass
Both Owens Corning blown-in insulation and generic fiberglass loose-fill share many fiberglass benefits, but key differences affect performance and peace of mind:
R-Value and Coverage
• Owens Corning: Higher R-value per inch and consistent density. Exceptional thermal resistance even in hard-to-reach spots.
• Generic Fiberglass: Good R-value at installation but variable density can leave thin areas.
Installation Method
• Owens Corning AttiCat: Requires a professional blower machine calibrated for AttiCat materials, ensuring uniform coverage.
• Generic Loose-Fill: Can be rented and DIY-blown, but inconsistent fill depth often reduces overall effectiveness.
Fire and Sound Performance
• Owens Corning: Treated with fire-retardant; superior sound absorption thanks to optimized fiber sizing.
• Generic Fiberglass: Generally fire-resistant but lacks specialized treatments; similar soundproofing only with thicker layers.
Sustainability
• Owens Corning: Up to 99% recycled content; lower environmental footprint.
• Generic Fiberglass: Varies by brand; often lower recycled content.
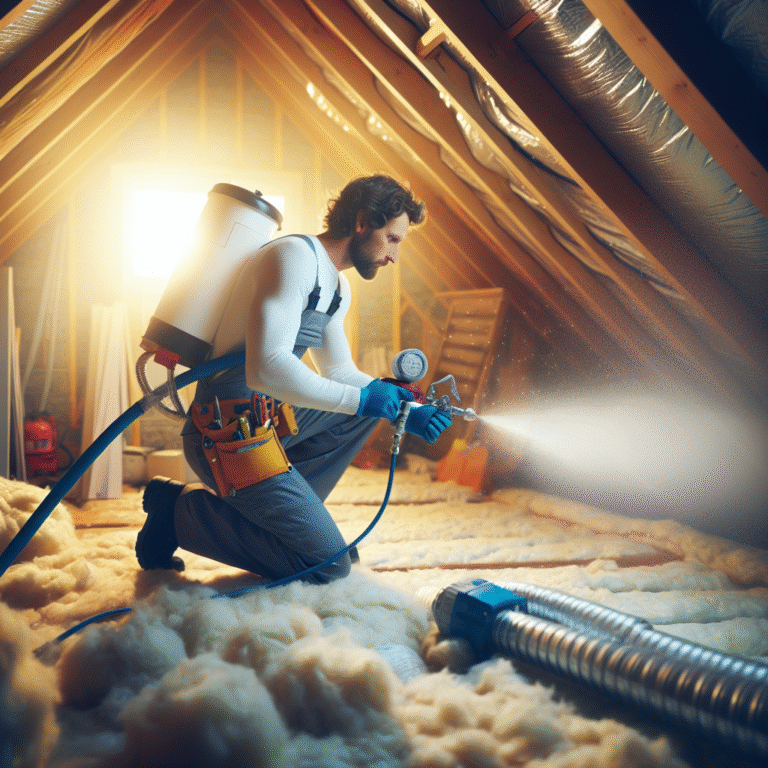
How to Install Owens Corning Blown-In Insulation for Maximum Efficiency
Proper preparation and technique ensure your attic reaps the full benefits of Owens Corning blown-in insulation:
1. Prepare Your Attic
– Seal air leaks around vents, light fixtures, and plumbing stacks with caulk or foam.
– Install or check attic baffles to maintain roof ventilation.
– Remove debris and old, damp insulation.
2. Gather Equipment and Materials
– Rent an AttiCat-compatible blower machine.
– Purchase Owens Corning AttiCat bags to achieve the recommended R-value (typically R-38 to R-60 for most climates).
– Wear protective gear: N95 mask, gloves, goggles, and long sleeves.
3. Load and Blow
– Follow machine instructions precisely when loading AttiCat bags.
– Start at the farthest attic corner, working back toward the access point to avoid walking on fresh insulation.
– Maintain a steady pace, moving the hose in a sweeping motion to distribute insulation evenly.
4. Verify Depth and Coverage
– Use a marked depth gauge or ruler to check that you’ve reached the target insulation depth.
– Adjust blower speed or travel speed as needed to maintain uniform coverage.
5. Finish and Clean Up
– Seal the attic entrance with an insulated cover.
– Remove excess material from walkways and living spaces.
– Store leftover AttiCat bags in a dry spot for future top-ups.
Frequently Asked Questions
Q1: How much attic insulation do I need?
A: Aim for R-38 to R-60, depending on your climate zone. That usually translates to 10–16 inches of AttiCat.
Q2: Can I install Owens Corning blown-in insulation myself?
A: While possible, professional installers ensure the correct machine settings, coverage, and safety protocols.
Q3: Will blown-in insulation settle over time?
A: Owens Corning AttiCat is engineered to resist settling, maintaining its R-value and coverage for decades.
Conclusion
Revamping your attic with Owens Corning blown-in insulation delivers immediate and lasting benefits: lower energy bills, enhanced comfort, quieter rooms, and a healthier home environment. By choosing this premium, eco-friendly solution and following proper installation steps, you’ll transform forgotten attic space into a robust thermal shield. Embrace Owens Corning blown-in insulation today and enjoy a more efficient, comfortable home for years to come.