Effortlessly Insulate Your Attic: The Ultimate DIY Blow-In Insulation Guide

“Efficiently insulate your home with the best blown-in insulation for maximum comfort and energy savings.”

Introduction

Blown-in insulation is a popular choice for homeowners looking to improve the energy efficiency of their homes. This type of insulation is made up of loose fibers or particles that are blown into the walls, attic, or other areas of a home using specialized equipment. It is known for its ability to fill in small gaps and crevices, providing a more complete and effective insulation solution. In this introduction, we will explore the benefits and advantages of blown-in insulation and why it is considered the best type of insulation for many homes.

5 Benefits of DIY Blown-In Insulation for Your Attic

When it comes to insulating your attic, there are several options available. One popular choice is blown-in insulation, which involves using a machine to blow loose insulation material into the attic space. While hiring a professional to install blown-in insulation may seem like the easiest option, there are actually many benefits to doing it yourself. In this article, we will explore five benefits of DIY blown-in insulation for your attic.

1. Cost Savings
One of the main advantages of DIY blown-in insulation is the cost savings. Hiring a professional to install blown-in insulation can be quite expensive, as it involves not only the cost of the insulation material but also the labor fees. By doing it yourself, you can save a significant amount of money. The equipment needed for blown-in insulation can be rented from most home improvement stores at a fraction of the cost of hiring a professional. Additionally, you can choose the type and amount of insulation material that fits your budget, further reducing the overall cost.

2. Customization
Another benefit of DIY blown-in insulation is the ability to customize the insulation to fit your specific needs. When hiring a professional, they may use a one-size-fits-all approach, which may not be the most effective for your attic. By doing it yourself, you have the freedom to choose the type and amount of insulation material that best suits your attic’s size and shape. This allows for better coverage and ensures that your attic is properly insulated.

3. Time Efficiency
While it may seem like hiring a professional would save you time, in reality, DIY blown-in insulation can be a more time-efficient option. When hiring a professional, you have to schedule an appointment, wait for them to arrive, and then wait for them to complete the installation. This process can take several hours or even days, depending on the size of your attic. On the other hand, with DIY blown-in insulation, you can work at your own pace and complete the installation in a timeframe that works for you.

4. Ease of Installation
Many people may be intimidated by the idea of installing insulation themselves, but blown-in insulation is actually quite easy to install. The equipment used for blown-in insulation is user-friendly and does not require any special skills or training. With proper safety precautions, anyone can successfully install blown-in insulation in their attic. Additionally, there are many online tutorials and guides available to help you through the process.

5. Energy Efficiency
Last but certainly not least, DIY blown-in insulation can greatly improve the energy efficiency of your home. Properly insulating your attic can prevent heat from escaping during the winter and keep cool air in during the summer. This can result in significant savings on your energy bills. Additionally, blown-in insulation can also help reduce noise pollution, making your home more comfortable and peaceful.

In conclusion, while hiring a professional to install blown-in insulation may seem like the easier option, there are many benefits to doing it yourself. From cost savings to energy efficiency, DIY blown-in insulation can be a rewarding and cost-effective project for any homeowner. With the right equipment and proper safety precautions, you can successfully insulate your attic and reap the benefits for years to come.

Step-by-Step Guide to Installing Blown-In Insulation in Your Attic

Effortlessly Insulate Your Attic: The Ultimate DIY Blow-In Insulation Guide
Blown-in insulation is a popular choice for homeowners looking to improve the energy efficiency of their homes. It is a cost-effective and efficient way to insulate your attic, which is one of the main areas where heat can escape from your home. However, with so many different types of blown-in insulation available, it can be overwhelming to determine which one is the best for your home. In this article, we will discuss the best type of blown-in insulation and provide a step-by-step guide to installing it in your attic.

First and foremost, it is important to understand the different types of blown-in insulation. The most common types are fiberglass, cellulose, and mineral wool. Fiberglass is made of tiny glass fibers and is the most affordable option. Cellulose is made of recycled paper and is a more environmentally friendly option. Mineral wool is made of rock or slag fibers and is known for its fire resistance. Each type has its own advantages and disadvantages, so it is important to consider your specific needs and budget when choosing the best type for your home.

Once you have chosen the type of blown-in insulation, the next step is to prepare your attic for installation. This includes clearing out any debris or old insulation, sealing any air leaks, and ensuring proper ventilation. It is also important to wear protective gear, such as a mask and gloves, when handling the insulation.

The next step is to determine the amount of insulation needed for your attic. This can be done by using an insulation calculator or consulting with a professional. It is important to have the right amount of insulation to ensure maximum energy efficiency and to avoid any potential hazards.

Now it is time to start the installation process. The first step is to create a barrier around the attic access door to prevent the insulation from falling into your living space. This can be done by using cardboard or plastic sheeting. Next, you will need to set up the blowing machine and load it with the insulation material. It is important to follow the manufacturer’s instructions for the machine and wear protective gear while operating it.

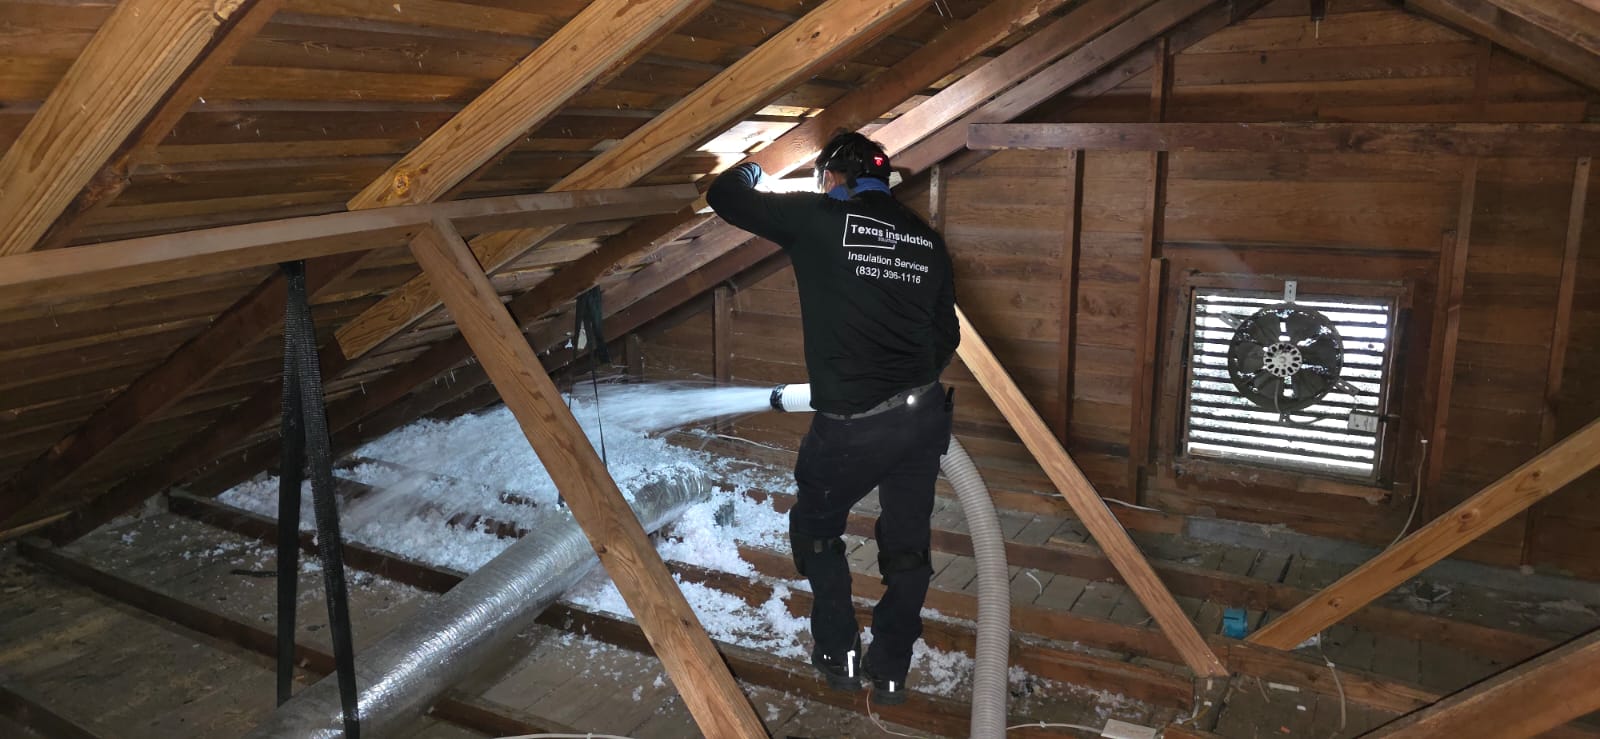
Once the machine is set up, you can start blowing the insulation into your attic. It is important to start from the farthest corner and work your way towards the attic access door. This will ensure that the entire attic is evenly insulated. It is also important to maintain a consistent depth of insulation throughout the attic.

As you are blowing the insulation, it is important to pay attention to any obstructions, such as pipes or electrical wires. These areas will need to be insulated manually using a different type of insulation, such as foam or batting. It is also important to avoid covering any recessed lights or vents, as this can be a fire hazard.

Once the insulation is evenly distributed throughout the attic, it is time to clean up and seal any gaps or holes. This will help to prevent any air leaks and ensure maximum energy efficiency. It is also important to properly dispose of any excess insulation and clean up any equipment used during the installation process.

In conclusion, blown-in insulation is a great option for insulating your attic and improving the energy efficiency of your home. The best type of blown-in insulation will depend on your specific needs and budget. By following this step-by-step guide, you can easily install blown-in insulation in your attic and enjoy the benefits of a more energy-efficient home. Remember to always follow safety precautions and consult with a professional if needed.

Comparing Different Types of Blown-In Insulation for Your DIY Attic Project

When it comes to insulating your attic, there are several options to choose from. One popular choice is blown-in insulation, which involves using a machine to blow loose insulation material into the attic space. This method is often preferred for DIY projects as it is relatively easy to install and can provide excellent coverage. However, not all blown-in insulation is created equal. In this article, we will compare different types of blown-in insulation to help you determine the best option for your DIY attic project.

Fiberglass blown-in insulation is one of the most commonly used types. It is made of tiny glass fibers and is known for its affordability and effectiveness in reducing heat loss. Fiberglass insulation is also resistant to moisture, mold, and pests, making it a durable option for attics. However, it is essential to note that fiberglass can be irritating to the skin and respiratory system, so proper protective gear should be worn during installation.

Cellulose blown-in insulation is another popular choice. It is made of recycled paper and treated with fire-retardant chemicals, making it a more environmentally friendly option. Cellulose insulation is also known for its excellent soundproofing capabilities, making it a great choice for attics that double as living spaces. However, it is essential to ensure that the attic is adequately sealed before installing cellulose insulation to prevent any potential fire hazards.

Another type of blown-in insulation is mineral wool. It is made of natural materials such as rock or slag and is known for its high R-value, which measures the insulation’s ability to resist heat flow. Mineral wool is also fire-resistant and can provide excellent soundproofing. However, it is a bit more expensive than other types of blown-in insulation, and its installation can be more challenging due to its weight and density.

For those looking for a more eco-friendly option, there is also cotton blown-in insulation. It is made of recycled denim and is free of harmful chemicals, making it safe for both the environment and the installer. Cotton insulation is also known for its excellent thermal and soundproofing properties. However, it is more expensive than other types of blown-in insulation, and its installation can be more time-consuming due to its weight and density.

One of the newest types of blown-in insulation is spray foam. It is made of a mixture of chemicals that expand and harden upon application, creating a tight seal. Spray foam insulation is known for its high R-value and its ability to fill in small gaps and cracks, making it a great choice for attics with irregular shapes. However, it is the most expensive option and requires professional installation due to the chemicals involved.

When choosing the best type of blown-in insulation for your DIY attic project, it is essential to consider factors such as cost, effectiveness, and ease of installation. Fiberglass and cellulose insulation are the most affordable options, while mineral wool and cotton insulation are more expensive. Spray foam insulation is the most expensive but also the most effective. Additionally, the attic’s condition and your budget will also play a significant role in determining the best type of insulation for your project.

In conclusion, blown-in insulation is an excellent choice for DIY attic projects due to its ease of installation and effectiveness in reducing heat loss. However, it is crucial to consider the different types of blown-in insulation available and their unique properties to determine the best option for your specific needs. Whether you choose fiberglass, cellulose, mineral wool, cotton, or spray foam insulation, proper installation and sealing are crucial for optimal results. With the right type of blown-in insulation, you can ensure a well-insulated and energy-efficient attic space.

Q&A

1) What is the best type of blown in insulation?
The best type of blown in insulation depends on various factors such as the climate, budget, and specific needs of the building. Some popular options include cellulose, fiberglass, and mineral wool.

2) Which type of blown in insulation is most cost-effective?
Cellulose insulation is often considered the most cost-effective option for blown in insulation. It is made from recycled materials and has a lower cost compared to other types of insulation.

3) What are the benefits of blown in insulation?
Blown in insulation can provide better coverage and fill gaps more effectively than traditional batt insulation. It can also improve energy efficiency, reduce noise, and is often made from eco-friendly materials.

Conclusion

In conclusion, the best type of blown-in insulation will depend on various factors such as the climate, budget, and specific needs of the building. However, some popular options include cellulose, fiberglass, and mineral wool. It is important to consult with a professional to determine the most suitable type of blown-in insulation for your specific situation. Ultimately, the best type of blown-in insulation will provide effective thermal insulation, soundproofing, and fire resistance while also being environmentally friendly and cost-effective.

more insights