“`html
The Ultimate Guide to Blown-In Insulation for Homes
Table of Contents
- Introduction
- What is Blown-In Insulation?
- Benefits of Blown-In Insulation
- How Blown-In Insulation Works
- Choosing the Right Insulation Material
- Installation Process
- Costs and Savings
- FAQ Section
- Conclusion & CTA
Introduction
As homeowners seek to improve their home’s energy efficiency and reduce utility bills, insulation plays a pivotal role. Among the numerous options, blown-in insulation stands out for its efficacy in creating a tight energy barrier. This guide delves into the advantages and procedures for incorporating blown-in insulation into your home.
What is Blown-In Insulation?
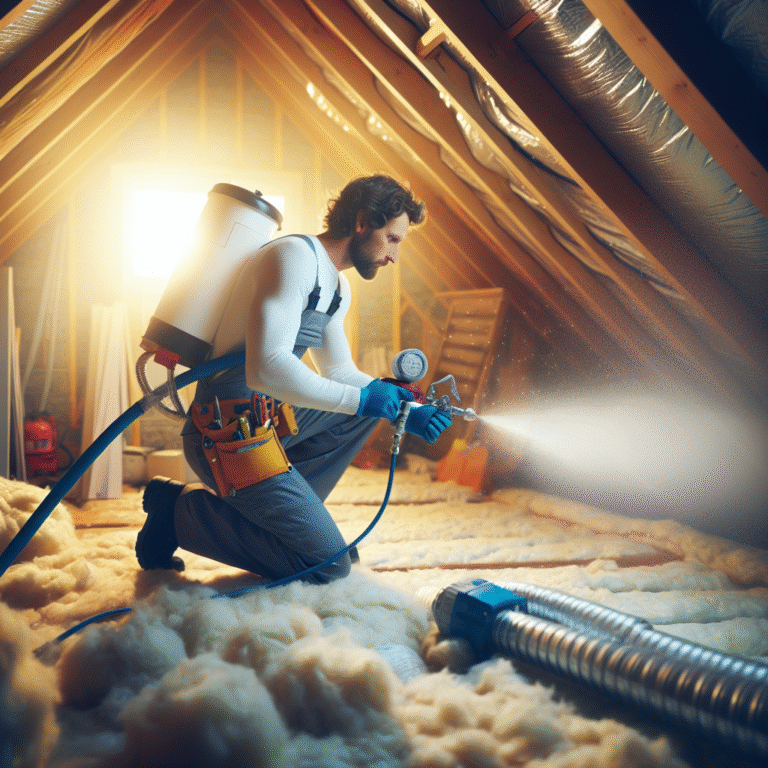
Blown-in insulation, also known as loose-fill insulation, involves small particles of fiber, foam, or other materials that are blown into building cavities or attics using special pneumatic equipment. The most common materials used are cellulose, fiberglass, and mineral wool, each with its unique properties and benefits.
Benefits of Blown-In Insulation
- Enhanced energy efficiency
- Improved home comfort
- Better soundproofing
- Flexibility in installation
- Environmentally friendly options
How Blown-In Insulation Works
Blown-in insulation works by filling in gaps, crevices, and hard-to-reach places within walls and attics. It acts as a barrier that restricts air movement and heat transfer, helping maintain a consistent temperature throughout the year, reducing the workload on heating and cooling systems.
Choosing the Right Insulation Material
Choosing the right type of material for blown-in insulation depends on your specific needs regarding thermal resistance, sustainability, and budget. Here’s a breakdown of the most popular materials:
- Cellulose: Made from recycled paper; ideal for environmentally conscious homeowners.
- Fiberglass: Made from fine glass fibers; excellent for reducing energy costs.
- Mineral wool: Known for its fire retardancy and soundproofing capabilities.
Installation Process
Step 1: Preparation
Before installation, a thorough assessment of your home’s current insulation condition and energy needs is necessary.
Step 2: Installation
The installation involves using specialized machines to blow the insulation materials into place, ensuring even distribution and density.
Step 3: Inspection
Post-installation, a final inspection is performed to guarantee efficacy and coverage, ensuring optimal energy performance.
Costs and Savings
While the initial cost of blown-in insulation can be higher than traditional batt insulation, the long-term energy savings can be substantial. Furthermore, blown-in insulation often qualifies for energy rebates and tax incentives which can mitigate upfront costs.
FAQ Section
Q: How effective is blown-in insulation for energy savings?
A: Blown-in insulation is highly effective in reducing heat loss in winter and heat gain in summer, leading to significant energy savings.
Q: Can blown-in insulation be added to existing walls?
A: Yes, one of the major advantages is that it can be easily added to existing structures without the need for extensive renovation.
Q: How long does blown-in insulation last?
A: With proper installation and maintenance, blown-in insulation can last for over 30 years, providing long-term energy efficiency and comfort.
Conclusion & Call to Action
Blown-in insulation offers an efficient solution for enhancing your home’s comfort and energy efficiency. If you’re considering updating or installing new insulation, blown-in insulation should be at the top of your list.
???? Click Here Click here to explore your options and get started on improving your home’s energy performance today!
“`